Faça Suas Imagens Pequenas – O Modo Fácil
Avoid unpleasant surprises when sending digital pictures to your friends. You can convert your pictures to a smaller, more manageable size using tools you already have and without having to use complicated photo programs. Windows Explorer and Outlook help you accomplish this quick trick…
Step 1 - Find Your Pictures with Windows Explorer
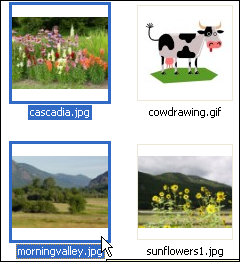
Open Windows Explorer on your computer. One way you can do this is by choosing Start | Programs | Accessories | Windows Explorer. Then navigate to the folder that contains your photos.

Step 2 - Select Pictures and E-Mail
Holding down the CTRL key, click each photo or image you want to send. When finished, right-click with your mouse. You can then select Send to... from the menu that appears and Mail Recipient from the submenu.

Step 3 - Select Picture Options
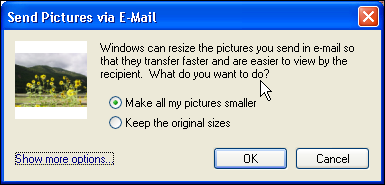
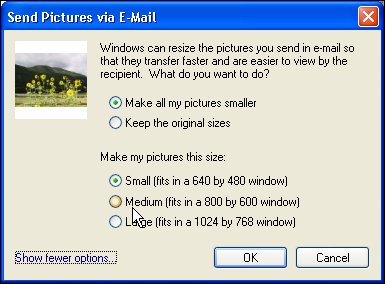
A dialog will display, asking if you want to make your pictures smaller. To specify how small you want to make the pictures, click the Show More Options link.

Select the appropriate picture size, then click OK.

Step 4 - Compose E-Mail
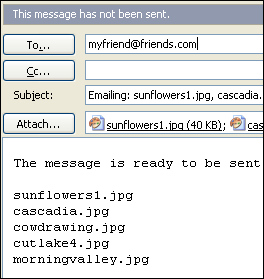
An Outlook e-mail will open. You can type in the e-mail addresses you want to send to, make any changes you wish to the e-mail, then click Send.

Voila! Your images are smaller and more manageable with minimal effort. Now your friends can enjoy your pictures, rather than having to grapple with super-sized images or large e-mails in their inbox. (Note: All screen shots in this tip were taken with Solid Capture.)
|