Solid Capture Setup Tips
Make sure you get the most out of Solid Capture by adjusting it's settings up to accommodate your workstyle. The Options selections in Solid Capture are intended to help you use Solid Capture in the way that you prefer. To begin adjusting your settings, click on the Options button in the Solid Capture main toolbar.
Tip 1: Different Capture Options by Capture Mode
You can easily adjust your settings separately for each capture mode on the Images tab. Notice there are tabs within labeled Standard, Window, Full Screen, and Rectangle...
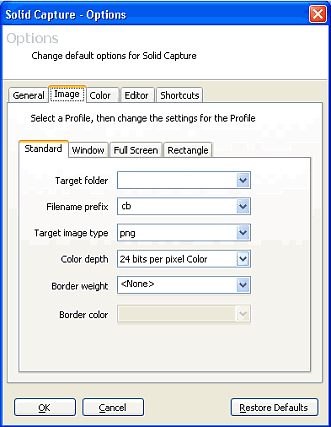
You can make adjustments to individual capture modes such as window capture or rectangle capture by making selections from the options on these tabs. Note: The Standard tab allows you to make changes that apply to ALL capture modes.
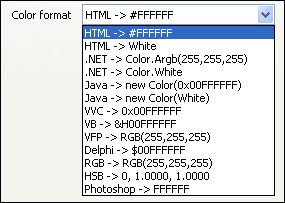
Tip 2: Color Value Options
Do you work with print design as well as Web graphics? You can view color values in a variety of formats. Under Color Capture Options, click the drop-down box next to the Color Format label. You can then, for example, choose to display color values in RGB instead of HTML when you use the Color Capture feature.
Tip 3: Show/Hide Cursor
Documentation professionals may sometimes want to display a cursor on a screen shot, sometimes not. You can easily toggle back and forth between the two settings with the Hide Cursor setting. The new setting takes effect immediately after you make the change. (Note: If you choose to display the cursor, make sure you position it correctly on the screen before taking your screen shot.)
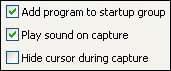
Tip 4: Add SolidCapture to your Startup Group
If you take numerous screen shots, it is handy to have SolidCapture running in the background. In Options, change the Add program to startup group setting to Yes. SolidCapture will then be automatically available in the background every time you start your computer. You can then easily activate SolidCapture with a hotkey combination whenever you want to make a screen capture.
| 